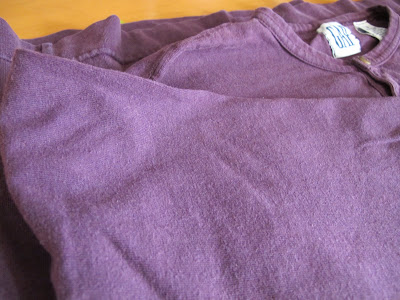
Sometimes warm, fresh from the dryer.
Sometimes crumpled on the floor.
Sometimes sweaty---sticking to your skin.
Sometimes just folded, cool in the drawer.
But always so soft.
Always so comfortable.
Always the perfect t-shirt.
And when it's no longer a t-shirt you want to wear, why not pass it on to a little one?
I pulled out a long-sleeve purple thing from high school (I don't know why I still have it). Knew that I wouldn't be caught dead in it. But Bean? Might just be able to carry it off as a dress.
Whimsy's Refashion: A Child's T-Shirt Dress From an Adult T-Shirt

Step 1.
The ingredients. You'll need a sewing machine, thread, scissors, and an adult t-shirt (size large or extra-large).
Step 2.
Turn the t-shirt inside out, and place it face up on your work surface.

Step 3.
You will need to know the approximate length you want for the dress. I wanted Bean's to go just below her knees to allow for some growth, so I measured the length from her shoulder to just below her knee
Step 4.
Fold the t-shirt directly in half - make sure that all the seams line up exactly.

Step 5.
Using a dress or slightly-big t-shirt from her closet as a guide, you'll trace the outline onto the soon-to-be-repurposed t-shirt with a pencil or pen. Only trace HALF, so that when you cut it out, it will be the same on both sides. As you can see, we'll be using the already-existing t-shirt neck. As you can also see, I'm tracing the outline bigger for a seam allowance.

As you get to the arm area, you'll allow extra room for the arm seams (note: the next time I do this, I'll actually make the arms bigger - her arms just barely fit into the sleeves right now, so not a good option for growth).

If you're using a child's t-shirt as a guide, once you have traced the arms, you will want to expand the dress beyond the outline of the child's t-shirt. A proper t-shirt dress should be a little flippy.

I extended the skirt area almost to the edges of the t-shirt.
The finished outline.

Step 6.
Pin the edges of your t-shirt so that you can cut through both layers of fabric without anything sliding around.

Step 7.
Keep the t-shirt folded in half, and cut on your traced lines.

Step 8.
Once you've cut it out, unfold the t-shirt and then carefully pin around the edges.
Step 9.
Keep the pins in as much as possible and sew up the sides of your creation. I used my machine's overlock stitch to do this - it is similar to a serged edge. But if your machine doesn't have this, just use a simple straight stitch and then go back and zig zag the edges. OR you can just leave the edges as-is. It might get a little rolled up inside there when you wash the dress, but it will still be fine.

Make sure you DON'T sew the arm holes or bottom closed!

Step 11.
Now that your sides are sewn up, you'll need to hem the arms and the bottom of the dress. Pin them up first, making a nice hemmed edge. If you'd like, you can iron these up so it will be easier to sew them.
Step 12.
Hem the arms and bottom.

Step 13.
Turn right side out.
Done!

The perfect addition to some leggies---- or over jeans---- or even just plain.

(Note: because we used the existing shirt's neckline, it will be a little big on a little girl - this is easily solved by layering the dress over a onesie or undershirt.)


7 comments:
Love it. If I had more than one girl child, I might have to buy myself a sewing machine. But then you'd have to teach me how to use it.
I've been sewing for years and had no idea how to do this. Bethsix. you could also make a tee shirt for boys too out of the old tee shirts.
That is so cute! I'm wondering if I could pull off that look.
I am in such craft envy of you, Whimsy.
So tell me, how did you get to be so crafty? Where did you learn your mad sewing skills?
DItto what Shelly said. You make me want a sewing machine.
This is w-a-y cool!
Oh I love this!
BTW, I haven't used a sewing machine since I had to in 4H, but when I saw one at Target at 75% off I almost bought it JUST BECAUSE OF THESE POSTS.
Post a Comment