
Well that was some fine madness yesterday, wasn't it? The longest post in HISTORY. And the pictures to prove it. If I told you how long it took me to upload and set that masterpiece, you'd send me away for a week of recovery time.
But seeing as how we aren't going to talk about how long it took me to upload and set yesterday's hot mess, let's focus today on a NEW, much shorter hot mess:
THE PACI CLIP.
Here's the story:
Prior to Bean's grand entrance into my life, when I was still pregnant and falling into refrigerators and such, I worked at a large retail clothing company. I didn't work on the salesfloor, and instead wiled away many hours with some lovely office folks (including a boss that I still miss because he made corny jokes and occasionally threw mints at my head, a sure sign of affection). Even though I was miles away from the salesfloor, I was still the willing sponge of High Fashion. It cannot be helped in that environment, so says I.
My unborn child was also the recipient of the Fashion Love. In the form of some really fantastic baby gifts.
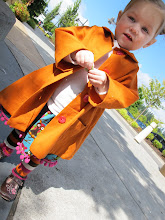
One day I waddled into work to find a sizable box of Baby Gift Booty on my desk, offerings from the collection of Oregon store managers. Inside the box: a color-coordinated selection of the best our stores had to offer--- the cutest pacifiers, a lavender rain coat, a tiny jogging suit, socks, and a sweet beribboned silver clip.
The last one had me stumped.
Long striped ribbon with small silver clip doo-dad at one end. Velcro'd bit on the other end.
What?
I spent some time thinking about the doo-dad until I overcame my overtly fashion-cringeable naivete and asked the fabulous Kristy, What is this thing?
She responded breezily (Because she was effortlessly breezy, all the time, and one would want to hate her a little bit for being so fabulous and breezy, but you couldn't hate her because she was also NICE and really AWESOME and never made the non-breezy and effortful me feel the least bit weird- So.)
Her response: A clip. For the pacifier.
Oh.
And fantastic.
After Bean was born it was a while before the whole paci obsession took hold. But the months zoomed by and we started to invest in those little suckers because gosh darn it - they are losable little things.
I used my coveted paci clip in the diaper bag to keep it within hand's reach.
Then I realized: I could keep it ON THE BABY. Clipped, you know.
Which was also when I decided that pink is pleasant, but oh what about ALL THE OTHER COLORS AND PATTERNS IN THE RIBBON AISLE?
I figured out how to make them soon afterward. And now you'll know how to make them too.
The Paci Clip Tutorial
Step one.
For the ingredients you'll need about 16 inches of 1-inch ribbon (I prefer grosgrain, that's the ribbon with the ridges), 1 inch of velcro, a sewing machine, and a set of mitten /suspender clips.


A couple of notes about these ingredients: First off, you can find the mitten clips in the notions section of your local fabric store. If you can't find them easily, just ask a salesclerk. If you have options on size, get the 1-inch version. Second, in regard to the ribbon: I have only ONCE found true 1-inch ribbon. It hardly exists, so don't get upset if you can't find it. Get the 7/8 width instead and it will work just fine. But do try to go for a heavier ribbon weight - hence my suggestion of grosgrain. The heavier the weight, the easier this is going to be.
Step two.
Lay the ribbon right-side down on your work surface and fold over a bit of the ribbon.

Step three.
Use your fingers to push this bit of folded ribbon through the suspender clip and then pin in place. You'll notice that the front of the suspender clip (top) is facing the same way as the front side of the ribbon. This is so you'll see the pretty side of the ribbon when it is clipped to your Child of Choice.

Step four.
Use your sewing machine's zig-zag to stitch the ribbon in place. I like to adjust the stitch length to make the zig-zags pretty darn close together. Go back and forth a couple of times - you want this to be a strong bond.

One part done, now on to the velcro side.

Step five.
Here is the other end of your ribbon (clip on one end, velcro will be on this other end).

Pin a little lip of it in place and then zig-zag it.


(As an alternative, if you're using a ribbon that won't fray easily, you can skip Step Five and just cut this end with some pinking shears. Proceed to sew the velcro on, using this stitch to fasten down a little tab of the pinked-edge ribbon.)


Step six.
Place velcro on the wrong side of the ribbon, one piece just 1/4 inch in from the zig-zag tab, and the second piece about two inches down.

You are DONE.


Tune in tomorrow for even more craft madness, where I tackle the question from Clueless But Hopeful Mama: some easy ideas for expanding a child's dress-up options (boys AND girls). Hint: There will be a CAPE involved.

5 comments:
Again with the sewing machine. Have you no mercy, Whimsy?
But really, if I owned a sewing machine, I would seriously try this. Because it looks easy and also cute. Much cuter than the plain lime green one we have with the plastic doohickey on the end.
Ooh, very pretty. We are past the pacifier stage. I was thinking of what this could be repurposed to. A wrist keychain-like thing? A miniature leash for the children? Some sort of cell phone carrying wrist-keychain like thing..
Help! I want to make one but not as a pacifier clip!
Wait. You can make pacifier clips?
MIND. BLOWN.
I know exactly what I'm doing this weekend (unless Ellie's curtain fabric comes in the mail. Then it might be a week more. But still! SOON!)
(Also! Dress up! CAPES! YES PLEASE HALP!!!!)
This is the perfect tutorial that I have been looking for. Thank you so much for especially including length of ribbon all others have said your length preference that would work if I had a child @ the age of using a pacifier LOL
I look forward to taking my daughters :) new lil sewing machine out to try it out, of course until I get the grasp & buy my own.
thank you so much for this tutorial. So easy, and will make a great baby shower gift for my niece. I was going to try to use snaps, but velcro is sooo much simpler!
Post a Comment